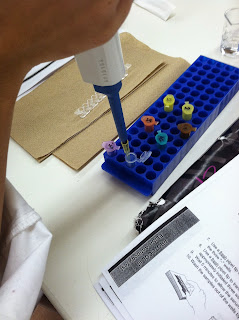
Today in lab we an ELISA Antibody test. The ELISA Antibody test is a test that detects antibodies in a person's blood to determine if the person has been exposed to a certain disease.
So we first obtained all of the supplies that we needed for this test: a cup full of wash buffer, two yellow tubes containing the serum samples that will be tested for the presence of antibodies, a tube full of purified antigen (AG), a tube full of the positive control, a tube full of the negative control, a tube full of the secondary antibody (SA), and a tube full of the enzyme substrate (SUB).
After we labeled the outside wall of our 12-well strip, we began our experiment.
We first used a fresh pipet to transfer 50 microliters of the purified antigen (AG) from the green tube into all of the 12 wells and waited 5 minutes so that the antigen could bind to the plastic wells
After 5 minutes we tipped the microplate strip upside down onto the paper towels so that the sample could drain out. We then used a transfer pipet filled with the wash buffer to fill each well with the wash buffer. After that we tipped the microplate strip upside down so that the wash buffer drains out.
We then used a fresh pipet tip to transfer 50 microliters of the positive control into the three wells that were labeled "+". Afterwards we took another fresh pipet to transfer 50 microliters of the negative control into the three wells that were labeled "-"
Below is a video of Rose doing measuring 50 microliters of the negative control and carefully placing it into the three "-" wells.
We then took another fresh pipet and transferred 50 microliters of the serum sample labeled "23" and "2" and placed it into their respective wells. Then we waited 5 minutes to allow the serum antibodies in the samples to bind to the antigen. After 5 minutes we washed the samples out of the wells by using the wash buffer and repeating what we did earlier.
Afterwards we used a fresh pipet tip to transfer 50 microliters secondary antibody (SA) from the orange tube into all 12 wells of the microplate strip. Then we waited 5 minutes for the secondary antibody to bind to the primary antibody. After 5 minutes we washed the unbound secondary antibody out of the wells making sure we did it twice.
After we finished washing we used a fresh pipet tip to transfer 50 microliters of the enzyme substrate (SUB) into all 12 wells of the microplate strip.
We then waited 5 minutes and this is what came up!
As you can see our sample "23" was positive for having the antibodies. However, since there was a little bit of the blue color in the "-" labeled wells as well as in the sample "2" wells we indicated that our sample is contaminated and we would have to do the experiment again but our professor was kind enough to not have us do another experiment.


No comments:
Post a Comment