All semester we have been doing procedures trying to figure our what our unknown bacteria was, and now we have come to a conclusion based on the accumulation of our results.
Here are our results compiled:
MORPHOLOGICAL CHARACTERISTICS
Cell Shape: Rods
Spore forming: yes
Gram Stain: positive (to variable)
Motility: motile
Capsules: no capsules
CULTURAL CHARACTERISTICS
Oxygen Requirements: facultative anaerobe
Optimum Temp.: 37 degrees centigrade
PHYSIOLOGICAL CHARACTERISTICS
Glucose: positive
Lactose: negative
Sucrose: negative
Mannitol: negative
Gelatin Liquefaction: negative
Starch: negative - We performed this procedure twice with the same results both times
Casein: negative
Fat: negative
Indole: negative
Methyl Red: positive
Voges-Proskauer (acetylmethylcarbinol): positive
Citrate Utilization: negative - We performed this procedure twice with the same results both times.
Nitrate Reduction: negative
Urease: negative
Catalase: positive
Oxidase: positive
DNase: negative
We had a hard time determining what our bacteria was, we were sure that it was gram positive, rods that had spores, but then we ran into some trouble with results from our starch and nitrate tests. We concluded from this that our bacteria must have at some point become contaminated by some other bacteria and this is why we were obtaining results that were not what was expected for our bacteria. From the information we had though.......we determined.......that our bacteria......is........
B. Cereus!!!!
Friday, December 6, 2013
ELISA (Enzyme-Linked Immunosorbent Assay) Antibody Test
Today in lab we an ELISA Antibody test. The ELISA Antibody test is a test that detects antibodies in a person's blood to determine if the person has been exposed to a certain disease.
So we first obtained all of the supplies that we needed for this test: a cup full of wash buffer, two yellow tubes containing the serum samples that will be tested for the presence of antibodies, a tube full of purified antigen (AG), a tube full of the positive control, a tube full of the negative control, a tube full of the secondary antibody (SA), and a tube full of the enzyme substrate (SUB).


After we labeled the outside wall of our 12-well strip, we began our experiment.

We first used a fresh pipet to transfer 50 microliters of the purified antigen (AG) from the green tube into all of the 12 wells and waited 5 minutes so that the antigen could bind to the plastic wells

After 5 minutes we tipped the microplate strip upside down onto the paper towels so that the sample could drain out. We then used a transfer pipet filled with the wash buffer to fill each well with the wash buffer. After that we tipped the microplate strip upside down so that the wash buffer drains out.
We then used a fresh pipet tip to transfer 50 microliters of the positive control into the three wells that were labeled "+". Afterwards we took another fresh pipet to transfer 50 microliters of the negative control into the three wells that were labeled "-"


Below is a video of Rose doing measuring 50 microliters of the negative control and carefully placing it into the three "-" wells.

We then took another fresh pipet and transferred 50 microliters of the serum sample labeled "23" and "2" and placed it into their respective wells. Then we waited 5 minutes to allow the serum antibodies in the samples to bind to the antigen. After 5 minutes we washed the samples out of the wells by using the wash buffer and repeating what we did earlier.
Afterwards we used a fresh pipet tip to transfer 50 microliters secondary antibody (SA) from the orange tube into all 12 wells of the microplate strip. Then we waited 5 minutes for the secondary antibody to bind to the primary antibody. After 5 minutes we washed the unbound secondary antibody out of the wells making sure we did it twice.
After we finished washing we used a fresh pipet tip to transfer 50 microliters of the enzyme substrate (SUB) into all 12 wells of the microplate strip.
We then waited 5 minutes and this is what came up!


As you can see our sample "23" was positive for having the antibodies. However, since there was a little bit of the blue color in the "-" labeled wells as well as in the sample "2" wells we indicated that our sample is contaminated and we would have to do the experiment again but our professor was kind enough to not have us do another experiment.
Thursday, December 5, 2013
Further interest in Antibacterial Agents
Since the mouthwash did not kill all of the bacteria that was on our hands, we decided to see how effective it is in killing the bacteria in Lindsey's mouth.
We took a swab of bacteria on Lindsey's gums and spread the bacteria on one half of a petri dish labeling it 'before mouthwash.' Then Lindsey swished a mouthful of mouthwash for 30 seconds and after she was finished we took another swab of bacteria on Lindsey's gums.
Here are the results!

We took a swab of bacteria on Lindsey's gums and spread the bacteria on one half of a petri dish labeling it 'before mouthwash.' Then Lindsey swished a mouthful of mouthwash for 30 seconds and after she was finished we took another swab of bacteria on Lindsey's gums.
Here are the results!
We found that the mouthwash didn't really kill any of the bacteria on Lindsey's gums. We concluded that either the mouthwash was really old or maybe there needs to be a consistent use of mouthwash.
Yogurt Experiment!!!
We obtained yogurt and milk and proceeded to put a small amount of yogurt and milk in two separate cups. For one cup we heated the milk and the yogurt and then put it into the yogurt incubator for about a day. For the other cup we just put the cup into the yogurt incubator without heating the milk and the yogurt.
After a day of incubation, one of our fellow microbiology classmates took the two cups and put it in the refrigerator.
Then when we returned to the lab the following day we tasted and looked at the two yogurt cups. We found that heating the milk and yogurt not only tasted better but the consistency was a lot better than the not heated cup. The cup that we did not heat looked more liquidly than the other one and tasted really sour.
Here are some pictures of Rose tasting the yogurt and what the yogurt looked like!
Testing for Food Purity
The point of this lab was to study a technique of immunology and apply it in a test for food purity. Immunology is the study of an organism's response to a foreign organic substance or antigen.
We acquired an agar plate divided into three equal zones. And we split the plate between two other groups.
 In our division of the plate we had to make four different wells in the agar. To do this we used a dropping pipet. And we first squeezed it letting out all the air, then inserted it into the agar and released the bulb to we then sucked up the small circle piece we just separated. We are arranged the four wells according to this diagram.
 Once we finished this we first filled well number one with Hamburger Extract. Following the instructions we proceeded to put goat anti-horse albumin in well 2, goat anti-bovine albumin in well 3,and goat anti-swine albumin in well 4.
 Once the other people put their solutions in their section of the agar plate, we placed the plate in a drawer face up to "incubate it". It had to be placed face up so that the solution that we put in the wells wouldn't pour out.

When we returned to lab in Thursday we found that our results we non-conclusive, or they did not work as they we expected to. This could have been from old solutions that we were using or some other factors.

We acquired an agar plate divided into three equal zones. And we split the plate between two other groups.


When we returned to lab in Thursday we found that our results we non-conclusive, or they did not work as they we expected to. This could have been from old solutions that we were using or some other factors.

Testing different Antibacterials..
We decided to test how well antibacterial products actually work.
For our sample we took swabs of our hands. My sample on one half and Rose's on the other half. To obtain this sample we had to first dip the swab in a saline solution, because the sample from our hands would be dry.
Once we each smeared our half of the nutrient agar plate we each chose two different antibacterial products to test out.
I chose to test mouth wash and hand sanitizer.


We then incubated our sample at 37 degrees centigrade, because that is the temperature of the human body and our hands where we obtained our sample. Next class we would see which antibacterial agents worked the best.
When we returned back to lab we found that all of the bacteria that were on our hands are able to be easily killed simply by washing their hands or by disinfecting the surface with Clorox bleach or Lysol wipes. However, if we try to wash our hands with mouthwash it is not as effective.
So wash your hands frequently and make sure to clean surfaces with disinfecting agents!!!
For our sample we took swabs of our hands. My sample on one half and Rose's on the other half. To obtain this sample we had to first dip the swab in a saline solution, because the sample from our hands would be dry.
Once we each smeared our half of the nutrient agar plate we each chose two different antibacterial products to test out.
I chose to test mouth wash and hand sanitizer.


While Rose tested Lysol wipes and Clorox bleach spray.


We soaked little discs in theses multiple solutions so we could set them in the separate sections of our nutrient agar plate.
In order to pick up the different discs we used forceps. To sterilize them we first ran them through the flame of the bunsen burner, then we dipped the tips of them in 70% ethanol alcohol.


We then incubated our sample at 37 degrees centigrade, because that is the temperature of the human body and our hands where we obtained our sample. Next class we would see which antibacterial agents worked the best.
When we returned back to lab we found that all of the bacteria that were on our hands are able to be easily killed simply by washing their hands or by disinfecting the surface with Clorox bleach or Lysol wipes. However, if we try to wash our hands with mouthwash it is not as effective.
So wash your hands frequently and make sure to clean surfaces with disinfecting agents!!!
Antibiotics!!
As nurses we are going to have to deal with the different kinds of antibiotics all the time!
So for this lab experiment we tested different antibiotics and how the worked on our unknown bacteria.
We had already become familiar with the antibiotic Bacitracin used for Streptococcus, or strep throat infection.
We first prepared a smear plate of our unknown bacteria using the aseptic technique.
Next using forceps, that were both sterilized in the flame of a bunsen burner and by spraying them with 70% ethanol, we removed a disc of each antibiotic and placed it is one of the five sections we divided the nutrient agar plate into.
We used: novobiocin, erythromycin, neomyosin, tetracycline, and penicillin.
We then put it in the incubator at 37 degrees centigrade, and waited to see what the results might be.
When we returned to class the next time we discovered which antibiotics worked the best.
Below are the results of our test:


As you can see all of the different antibiotics killed our bacteria. The neomyosin, however, did not work as effectively as all the other antibiotics because there was still bacteria growing on the sides of that section. The diameters for the antibacterial agents are as follows: penicillin has a diameter of 45 millimeters, tetracycline has a diameter of 45 millimeters, novobiocin has a diameter of 45 millimeters, erythromycin has a diameter of 45 millimeters, and finally neomyosin has a diameter of 30 millimeters. After determining the diameters, we can determine whether our bacteria was susceptible or resistant to the antimicrobial agents we tested. For penicillin the diameter has to be greater than 29 millimeters, for tetracycline the diameter has to be greater than 19, for novobiocin the diameter has to be greater than 22 millimeters, for erythromycin the diameter has to be greater than 23 millimeters, and finally for neomyosin the diameter has to be greater than 17 millimeters. Since all of our diameters are greater than their respective range this tells us that our bacteria is susceptible to all of the antimicrobial agents that we tested.
Therefore, we could say that if we obtain this disease we could easily kill the bacteria by virtually all the antibiotics that we tested!
So for this lab experiment we tested different antibiotics and how the worked on our unknown bacteria.
We had already become familiar with the antibiotic Bacitracin used for Streptococcus, or strep throat infection.
We first prepared a smear plate of our unknown bacteria using the aseptic technique.
Next using forceps, that were both sterilized in the flame of a bunsen burner and by spraying them with 70% ethanol, we removed a disc of each antibiotic and placed it is one of the five sections we divided the nutrient agar plate into.
We used: novobiocin, erythromycin, neomyosin, tetracycline, and penicillin.
We then put it in the incubator at 37 degrees centigrade, and waited to see what the results might be.
When we returned to class the next time we discovered which antibiotics worked the best.
Below are the results of our test:
As you can see all of the different antibiotics killed our bacteria. The neomyosin, however, did not work as effectively as all the other antibiotics because there was still bacteria growing on the sides of that section. The diameters for the antibacterial agents are as follows: penicillin has a diameter of 45 millimeters, tetracycline has a diameter of 45 millimeters, novobiocin has a diameter of 45 millimeters, erythromycin has a diameter of 45 millimeters, and finally neomyosin has a diameter of 30 millimeters. After determining the diameters, we can determine whether our bacteria was susceptible or resistant to the antimicrobial agents we tested. For penicillin the diameter has to be greater than 29 millimeters, for tetracycline the diameter has to be greater than 19, for novobiocin the diameter has to be greater than 22 millimeters, for erythromycin the diameter has to be greater than 23 millimeters, and finally for neomyosin the diameter has to be greater than 17 millimeters. Since all of our diameters are greater than their respective range this tells us that our bacteria is susceptible to all of the antimicrobial agents that we tested.
Therefore, we could say that if we obtain this disease we could easily kill the bacteria by virtually all the antibiotics that we tested!
Monday, November 25, 2013
Culturing Anaerobic Bacteria!
In a previous test we found out that our bacteria was anaerobic, but we were not yet sure if it was facultative or a strict anaerobe. But we were going to find out.
A strict anaerobic bacteria is one that cannot grow in the presence of oxygen.
To determine this we used the GasPak Anaerobic system. Everyone in the class made a smear plate of their bacteria and put it into the container.


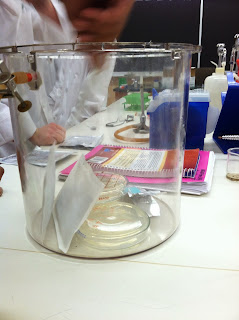
We then put some thermo-packs into the container, and an anaerobic indicator strip so be could see when it turned blue that there was no more oxygen left in the container.
Then we sealed the container with a screw cap, closing it tightly so no oxygen could get in.
We then incubated our bacteria at 37 degrees centegrade, and waited to see what our results might be.


A strict anaerobic bacteria is one that cannot grow in the presence of oxygen.
To determine this we used the GasPak Anaerobic system. Everyone in the class made a smear plate of their bacteria and put it into the container.


We then put some thermo-packs into the container, and an anaerobic indicator strip so be could see when it turned blue that there was no more oxygen left in the container.
Then we sealed the container with a screw cap, closing it tightly so no oxygen could get in.
We then incubated our bacteria at 37 degrees centegrade, and waited to see what our results might be.


When we took the GasPak out of the incubator and obtained out bacteria samples from it, we found out that our bacteria was not a strict anaerobe, because it did not grow in the container.
We instead determined that our bacteria was facultative anaerobic.
Just swabbing eachother's noses!!
Swabbing a nose, seems pretty gross right. Especially when it is your own nose. You are totally self conscious about what they are going to find in there.
But for a nursing student, something like this is super exciting!!
So to begin we partnered up with another lab group. We divided our mannitol salt plate into four quadrants, one for each of us. We all got our swabs, in a sterile package so as not to be contaminated by any other bacteria.
In doing this test we were looking for the bacteria Staphylococcus aureus. Now lets swab some noses!!
Because the nose isn't as moist of an environment as our throat we first have to dip the swab in a saline solution so we can pick up the bacteria more easily.
After we dipped the swab in saline, we then put it right inside the nose, but towards the front (not far back) and putting some pressure we circled it around the walls of the nose to ensure we obtained a pure sample.
Then we are spread the swab on our quadrant of the mannitol salt plate, and put it in the incubator, at 37 degrees centigrade, which is our body temperature, and waited to see what results we would obtain.


Here are the results that we obtained!!
Three out of the four are safe, and the bacteria cultures are not turning a yellowish culture so they are free of Staphylococcus aureus. But one of the nose samples did contain Staphylococcus aureus, we can tell because the bacteria turned a yellowish color in the mannitol salt plate.
It was really cool to do this test to practice skills that we will be utilizing in the hospital once we are real nurses.
Our Field Trip to the Water Treatment Plant!
Yay, another microbio field trip!
So for this field trip we got to become a drop of water travelling through the water treatment plant. The process is a lot more extensive than I would have thought. First they must remove all the large waste, this is stuff that we put there from littering or flushing things down the toilet that do not belong there. We learned to never flush any sort of unsafe chemical or medicines or drugs down the toilet, because these can be very hard to remove from the water and can therefore be very harmful to the environment. We also discover that sometimes little animals get caught in this process, we even saw a dead beaver in some of the water storing vats...gross. Anyways then the water goes onto further purification. Then it is put in the vats allowing the different algae and other contaminants to rise to the top, this is then filtered out and the sludge as they call it is used for a different purpose, not merely disposed of. Water treatment plants can sell their sludge to farmers to use as fertilizer. But they first must examine the amounts of microbes present within it. There are different classifications, with a higher rating correlating with less microbes in the sludge. In order to kill some of the thermophile microbes, the sludge must be heated to high temperatures, and we were able to see the furnace that they used to heat this in. Currently they are producing grade 2 sludge, but would like to in the near future make arrangements to make their sludge grade 1.
Before they are ready to dump the water back into the river they add the chemical citrate acid to purify the water even more, killing unwanted microbes, trying to prevent any further contamination of the environment.
Many people left after this, but a few of us stayed to see what took place within the lab. Every day, multiple times a day they must test the water and sludge for multiple different things in order to determine the microbes in them and the quantity of them. They are only allowed to release a certain amount of microbes back into the environment, and are held under strict rules to make sure they do not go over those numbers.
It was a really cool day, and so awesome to be able to learn all the microbiology that goes behind treating water!
Hmmm....
The results of all our tests seem a little strange considering that we believed that our bacteria was gram-negative.
For our blood agar plate, we determined that our bacteria do not secrete enzymes that completely dismantle the red blood cells, also known as gamma-hemolysis.


For the Phenylethyl Alcohol (PEA) Agar, we found that our bacteria grew a little bit on the agar plate, which was a little weird considering we thought our bacteria are gram-negative and PEA inhibits the growth of gram-negative bacteria.

In our thioglycollate broth tube, our bacteria grew in a pretty cool way where it grew right in the middle of where oxygen is not present in the tube. Our bacteria are anaerobic but it is amazing to see our bacteria floating in the middle of our tube!


For our blood agar plate, we determined that our bacteria do not secrete enzymes that completely dismantle the red blood cells, also known as gamma-hemolysis.
For the Eosin Methylene Blue (EMB) plate, we found that since our bacteria is gram-negative, our bacteria grew a little bit.
For our Mannitol Salt Agar, we found out that our bacteria cannot live in a high salt environment since our bacteria did not grow on the agar plate. This means that our bacteria are not halophile.
For our MacConkey Agar plate, we determined that our bacteria can not ferment lactose because they are not able to grow on this medium.
For the Phenylethyl Alcohol (PEA) Agar, we found that our bacteria grew a little bit on the agar plate, which was a little weird considering we thought our bacteria are gram-negative and PEA inhibits the growth of gram-negative bacteria.
In our thioglycollate broth tube, our bacteria grew in a pretty cool way where it grew right in the middle of where oxygen is not present in the tube. Our bacteria are anaerobic but it is amazing to see our bacteria floating in the middle of our tube!
For our DNA Hydrolysis test, we needed to flood the plate with 1N HCl (hydrochloric acid) to determine if our bacteria are able to hydrolyze (digest) DNA.
After adding 1N HCl since there is no clear area around our bacteria growth we determined that our bacteria are not able to hydrolyze (digest) DNA.
Conclusion:
After we looked over all of the results, we found that some of the results came out weird considering that we thought our bacteria was gram-negative. So our professor told us to do another gram-stain of our bacteria.
After doing another gram-stain of our bacteria, we found that our bacteria has both gram-negative and gram-positive stains (as shown above). We showed the gram-stain to our professor and he determined that our bacteria are more gram-positive than gram-negative BUT! our bacteria are able to take on both stains, which makes it gram-variable also. Therefore, our results were a little weird because our bacteria are gram-positive to gram-variable. Our bacteria seems to not like to make up it's mind!
Test upon test upon test!!!
We did so many more tests in lab!
These experiments included a Catalase test, culturing Anaerobic bacteria, an DNA Hydrolysis test and seeing how our bacteria grew on a blood agar plate, an Eosin Methylene Blue (EMB) Agar, a Mannitol Salt Agar, a MacConkey Agar, a Phenylethyl Alcohol (PEA) Agar.
First our professor had us do a streak plate of our bacteria on a nutrient agar plate. At first we did not know what to do with it but then we found out that we would do a catalase test with that streak of bacteria. With the catalase test, we added a few drops of 3% of hydrogen peroxide to our streak of bacteria. It was really cool to see that our bacteria use the enzyme catalase to quickly break down H2O2 into water and O2 (as shown below)


We then obtained a thioglycollate broth to inoculate with our bacteria.


By inoculating a thioglycollate broth we will be able to cultivate bacteria that cannot survive in the presence of oxygen.
Next we used the aseptic technique to inoculate all of these agar plates with an inoculating loop full of our bacteria. We had a little bit of fun by writing our own initials or the initials of our school on the agar plates.
We first inoculated our blood agar plate.


Now we just have to incubate the plate for two days and see if our bacteria are able to lyse red blood cells.
Now onto the Eosin Methylene Blue (EMB) Agar plate. We again did the aseptic technique with an inoculating loop full of bacteria.


We then put the EMB plate into the incubator for two days and after two day we will see if our bacteria are gram-negative enteric bacilli.
Next is the Mannitol Salt Agar.

For this test we will be able to isolate our bacteria based on their salt tolerance and differentiate among these isolates for mannitol fermentation.
Then we inoculated a MacConkey Agar.

If you can see we had a little by putting the initials of our school on the agar plates. Anyways for this test we are able to detect if our bacteria are gram-negative enteric bacilli, based on their ability to grow on the medium and to ferment lactose.
Our next agar plate that we inoculated was a Phenylethyl Alcohol (PEA) Agar.

For this test we will be able to isolate gram-positive bacteria if our bacteria has a mixture of gram-positive and gram-negative bacteria.
Finally we inoculated a DNA agar plate for a DNA Hydrolysis test.

For this test we will be able to see if our bacteria are able to hydrolyze (digest) DNA.
We incubated all of these plates and broth tube at 37 degrees Celsius and we will see what our bacteria can and cannot do!
These experiments included a Catalase test, culturing Anaerobic bacteria, an DNA Hydrolysis test and seeing how our bacteria grew on a blood agar plate, an Eosin Methylene Blue (EMB) Agar, a Mannitol Salt Agar, a MacConkey Agar, a Phenylethyl Alcohol (PEA) Agar.
First our professor had us do a streak plate of our bacteria on a nutrient agar plate. At first we did not know what to do with it but then we found out that we would do a catalase test with that streak of bacteria. With the catalase test, we added a few drops of 3% of hydrogen peroxide to our streak of bacteria. It was really cool to see that our bacteria use the enzyme catalase to quickly break down H2O2 into water and O2 (as shown below)
We then obtained a thioglycollate broth to inoculate with our bacteria.
By inoculating a thioglycollate broth we will be able to cultivate bacteria that cannot survive in the presence of oxygen.
Next we used the aseptic technique to inoculate all of these agar plates with an inoculating loop full of our bacteria. We had a little bit of fun by writing our own initials or the initials of our school on the agar plates.
We first inoculated our blood agar plate.
Now we just have to incubate the plate for two days and see if our bacteria are able to lyse red blood cells.
Now onto the Eosin Methylene Blue (EMB) Agar plate. We again did the aseptic technique with an inoculating loop full of bacteria.
We then put the EMB plate into the incubator for two days and after two day we will see if our bacteria are gram-negative enteric bacilli.
Next is the Mannitol Salt Agar.
For this test we will be able to isolate our bacteria based on their salt tolerance and differentiate among these isolates for mannitol fermentation.
Then we inoculated a MacConkey Agar.
If you can see we had a little by putting the initials of our school on the agar plates. Anyways for this test we are able to detect if our bacteria are gram-negative enteric bacilli, based on their ability to grow on the medium and to ferment lactose.
Our next agar plate that we inoculated was a Phenylethyl Alcohol (PEA) Agar.
For this test we will be able to isolate gram-positive bacteria if our bacteria has a mixture of gram-positive and gram-negative bacteria.
Finally we inoculated a DNA agar plate for a DNA Hydrolysis test.
For this test we will be able to see if our bacteria are able to hydrolyze (digest) DNA.
We incubated all of these plates and broth tube at 37 degrees Celsius and we will see what our bacteria can and cannot do!
Subscribe to:
Posts (Atom)